Creating a web drum machine
I always loved music and computers. Working as a web developer I discovered React and the Web Audio API. So today we are going to build a web drum machine (you had probably already guessed that). I’m going to use a very popular framework called React, if you’re not familiarized with it you should check out the basics at React Site:
What Is a drum machine?
drum ma·chine
drəm məˈSHēn/
noun
a programmable electronic device able to imitate the sounds of a drum kit.
Yep, that’s it.
They exist in hardware as well as in software.
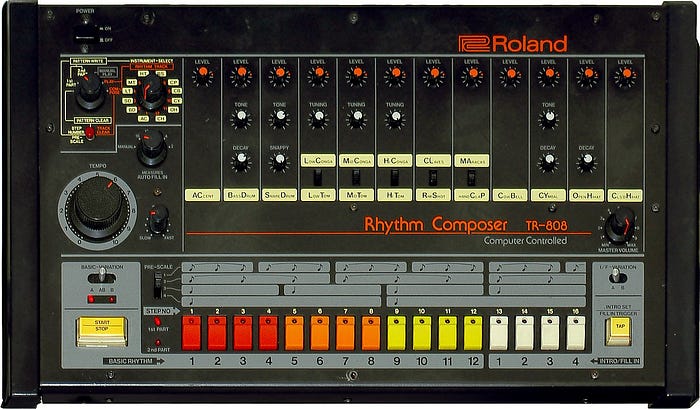
This one is the famous Roland TR-808. It was used by Afrika Bambaataa, Whitney Houston, New Order and pretty much every other famous musician ever.
It sounds so good that even today people will pay thousands of dollars and fight each other for one of these.
But lets face it, I’m a computer nerd, I can’t fight. So we are going to replicate some of it's features in software!
Architecture
This is one of the most important thing to do when you are developing in React. So lets start with it.
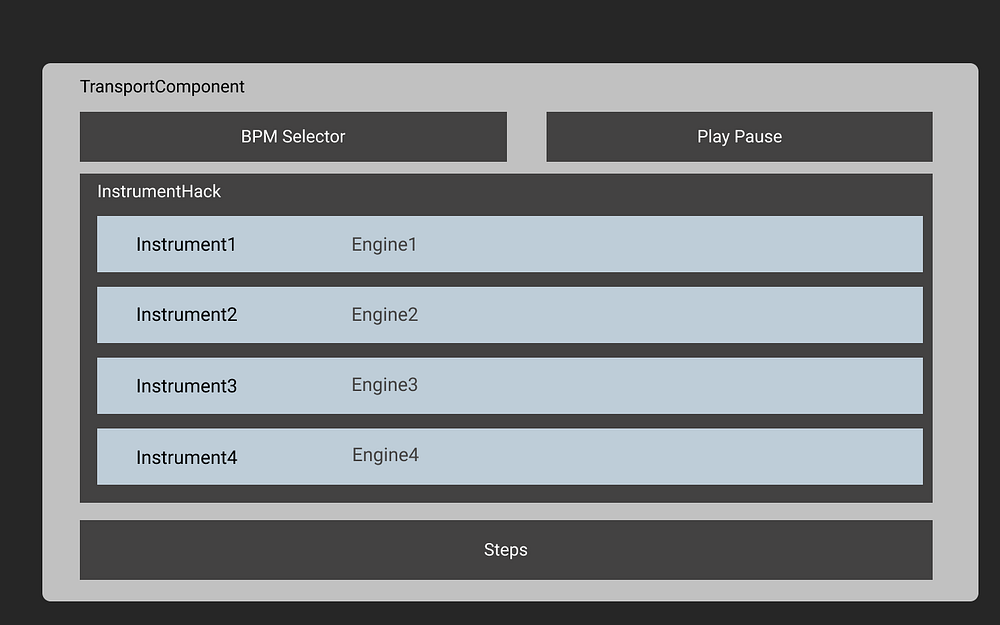
Poorly drawn but let me explain it.
Transport is the component that syncs every other component. It has a BPM component to control it's speed (beats per minute) and a Play/Pause component to, well, play it and pause it. We will have 4 different instruments, I’ve drawn 2 for simplicity.
Let’s get technical.
Synchronization is a very tedious and not intuitive task with the vanila JavaScript. So we are going to use an incredible library called Tone.js. It can handle every audio aspect from synthesis to playback in a very elegant and simple manner. Bonus point: their documentation is very easy to understand.
Tone has a feature called the Transport which you saw in my diagram. The transport is a relative time line in which we are going to schedule events (instrument hits).
Beginning the Project
Microsoft has a ready to use TypeScript and React sample project. Oh I didn’t tell you? We’re using TypeScipt. If you are not familiarized with it don’t worry, it’s just like good ol’ JS but with types. You’ll be used to it by the end of this tutorial.
We will just follow the Github instructions and in the end we’ll have our project:
One last thing:
Our TS lint is very rigid and doesn’t like modules that don’t have types, which sadly is the case of the Tone lib. In order to be able to use tone without our lint freaking out we’ll have to disable noImplicitAny
For that go to the tsconfig.json and change
“noImplicitAny”: true, to “noImplicitAny”: false,
I would recommend doing the same for noUnusedLocals as I think it is a bit unnecessary. But feel free to choose.
The Transport Component
Lets now install the tone library. Just type this in your terminal app of choice.
npm install — save toneGreat. That’s all installation for tone.
For organization’s sake we’re going to create a components folder.
Inside it i’m going to place my TransportComponent.
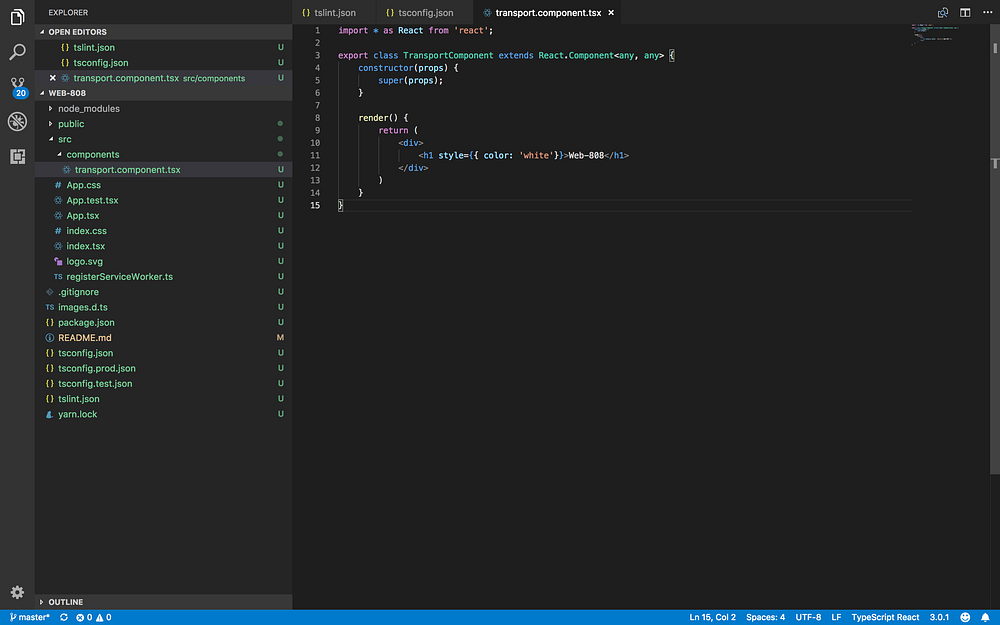
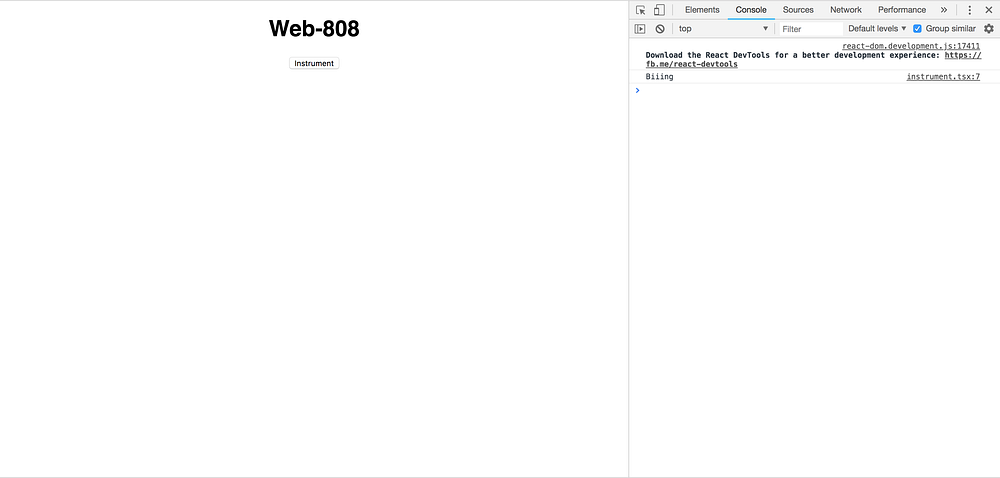
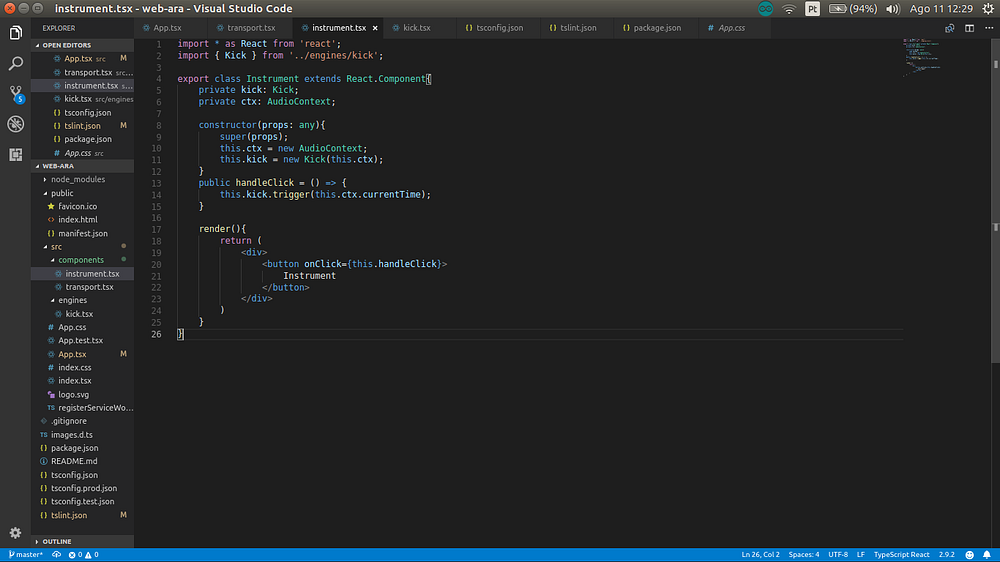
I’m not going to do any tone logic yet. I’ll just finish layering the structure for our drum machine. So create the Instrument and put it inside the TransportComponent as well. We’ll make the instrument as being a button for now that logs something. Later we’ll make it produce a sound.
Put one instrument inside the transport and put a transport in the app and when you click the instrument
Sound Engines
Well this has the potential to be the hardest part of the app. I’ll try to not get too technical, principally because there is a great explanation of the engine principles in the article published by Chris Lowis on the dev Opera site.
But in principle what we want to do is create a kick drum sound. We could download a kick drum sound and play it when the button was pressed, but whats the fun in that? Besides, this approach gives you waaaay more control over the sound.
Lets create an engines folder and start with the kick.
Kick Synthesis
The kick drum sound is a single sine wave changing it’s pitch (frequency) and loudness(gain) over time. That’s very simplistic, but it works.
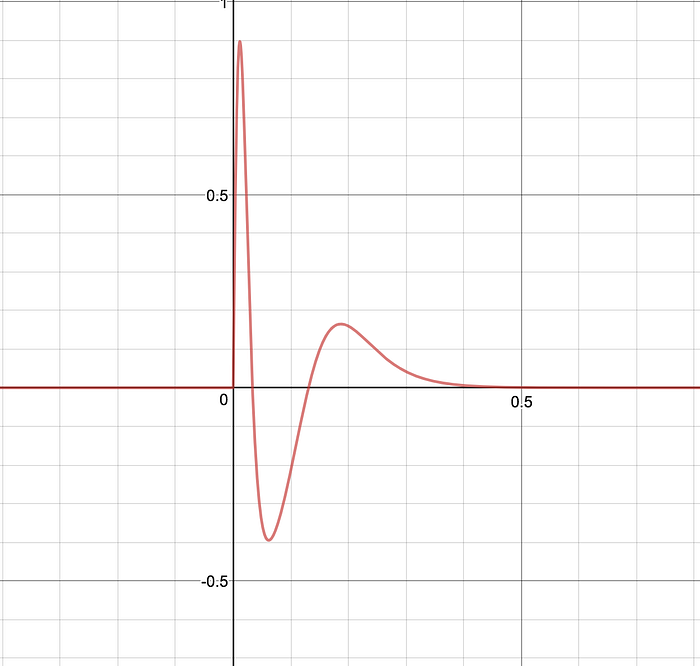
The frequency will start at 150Hz and fall to 1Hz after 0.5 seconds. The gain will start at 1 and fall to 0.01 after the same 0.5 seconds. That time is our kick’s decay.
It would be a pain to calculate all this by hand, but for our lucky selves the web audio API has a function for that
var AudioParam = AudioParam.exponentialRampToValueAtTime(value, endTime)Great, isn’t it?
So our kick engine will look something like this
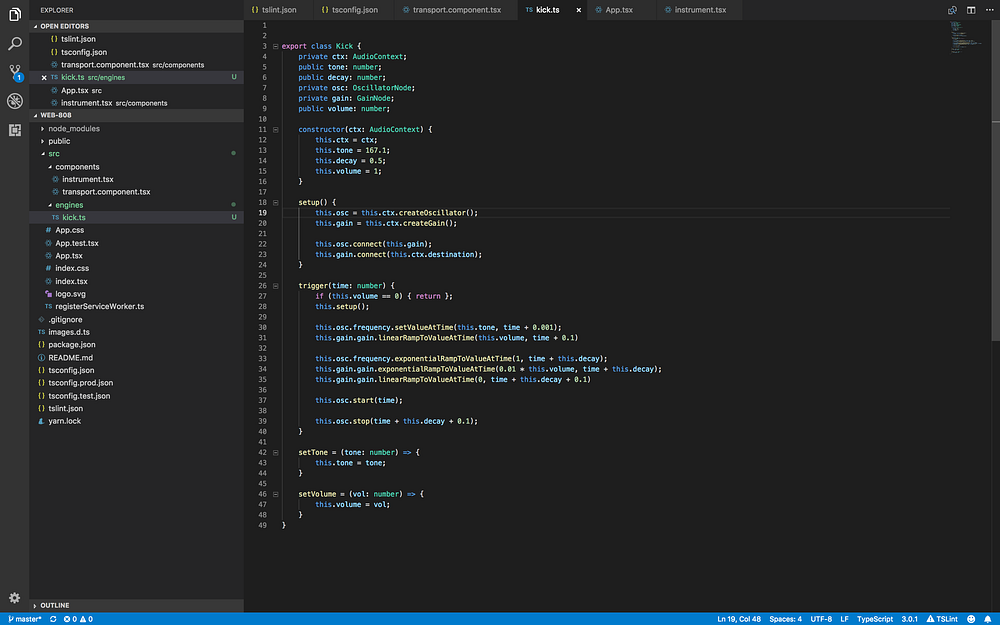
Now we create an instance of the kick engine and trigger it when we click on the instrument’s button. We can hear the stomp now.
Nice.
Loopin’
This kick is cool but songs usually have them repeated many times. My hands would get tired to be pressing that button in average 480 times per song. So our restless computer can do that for us.
Import the Transport from tone. Then we’ll schedule 4 kicks spaced by 0.5 seconds (equivalent to 120 beats per minute) when the transport starts. We’ll also set the transport to loop after 1m (1 measure)
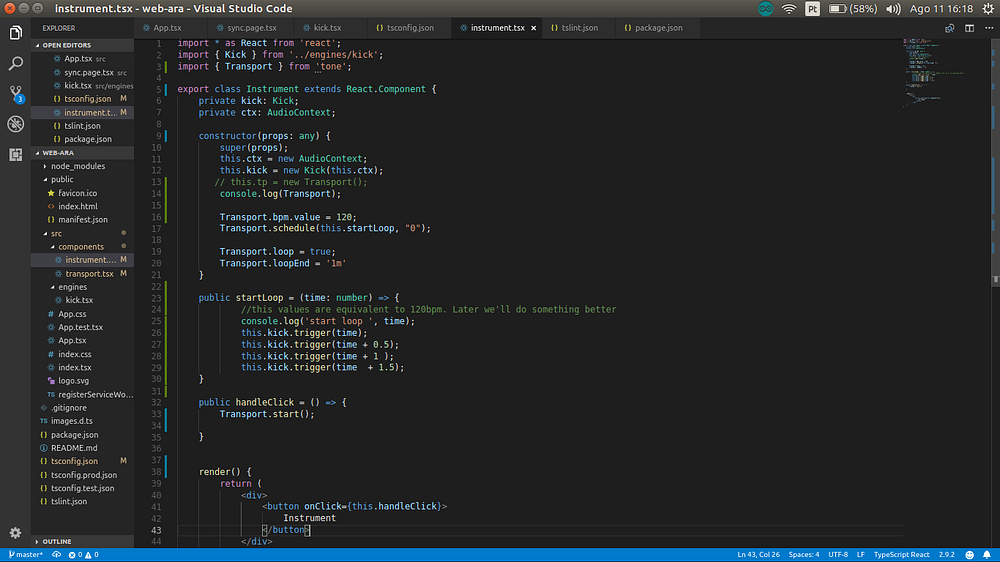
Now when you click the button the loop starts.
Instrument Hack
But there is a problem. We can't have each instrument to play the Transport. No.
So what we’re going to do is create an InstrumentHack. This component will be responsible for playing all it's children elements at the same time. For now it just renders them.
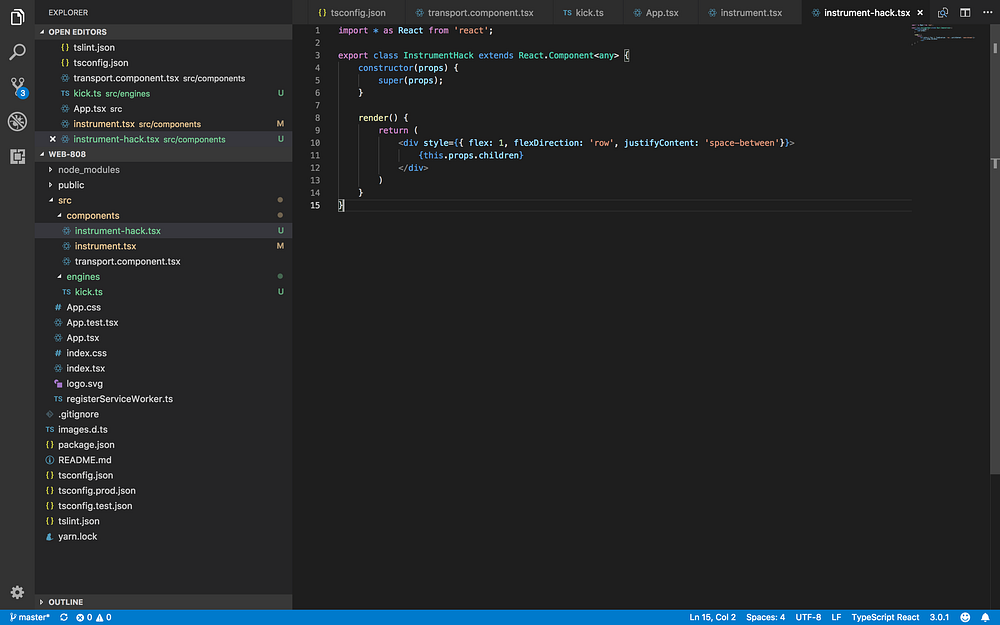
The instrument will be updated to have it's own loop and schedule it to the beginning of the transport time. The button will create the loop and start the transport time.
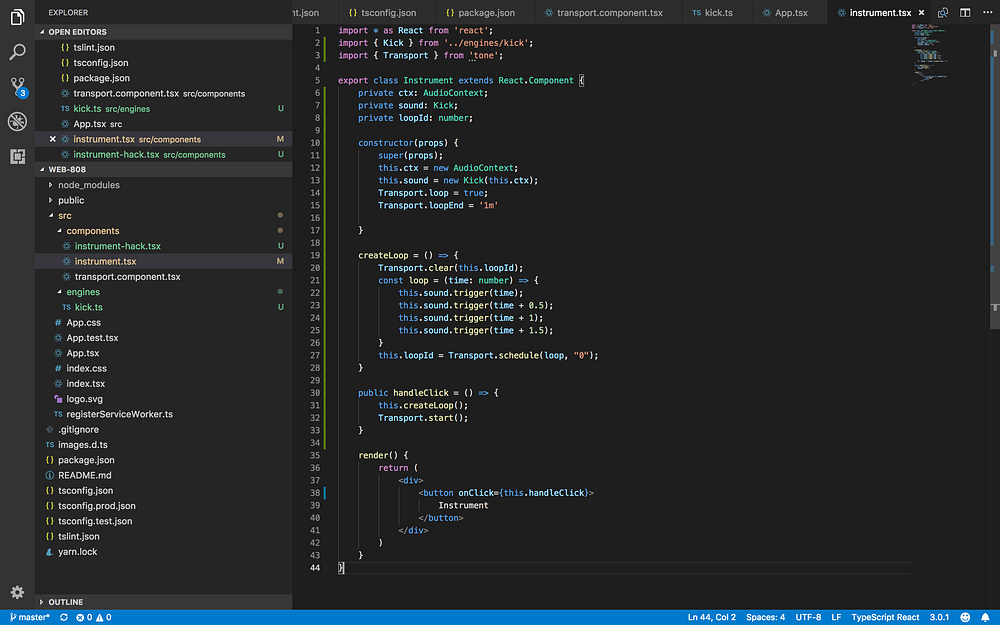
Now if you press the button, the loop should start.
Steps
Let's face it: this loop is boring. I want to be able to choose what pattern my drums play! That, ladies and gentleman, is the job of a step sequencer. There will be 16 steps, each of them representing a possible drum hit. If a step is pressed, the drum plays, if not, it doesn't.
Let's start by creating a single Step component. It will be just a div with some CSS (in second part I intend to use a lot of CSS and make this presentable) to represent On and Off and a callback for click. We are going to store which steps are On on the TransportComponent and give them to Steps by props.
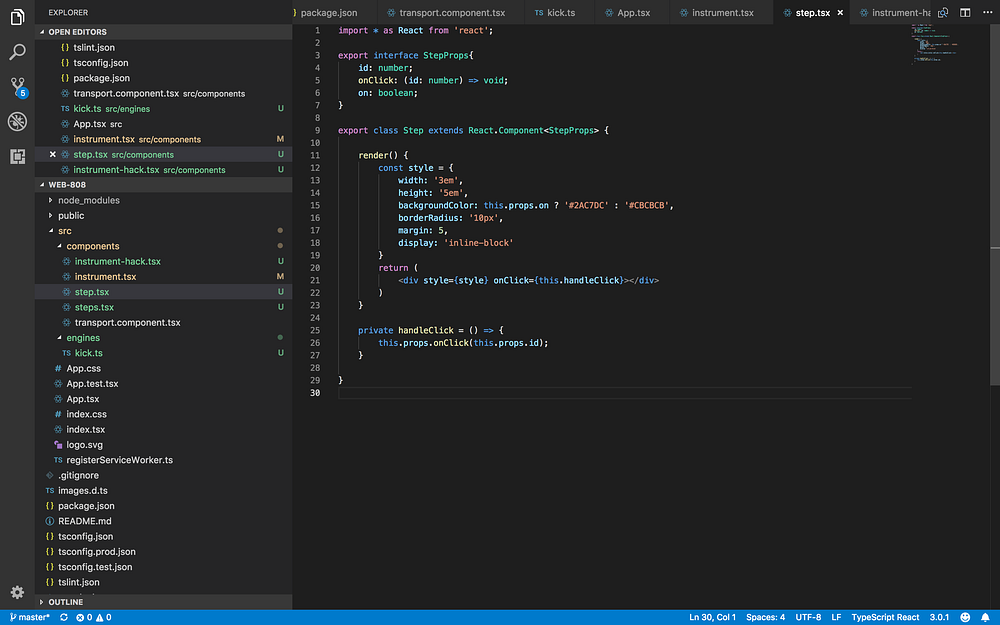
Now we create the Steps component.
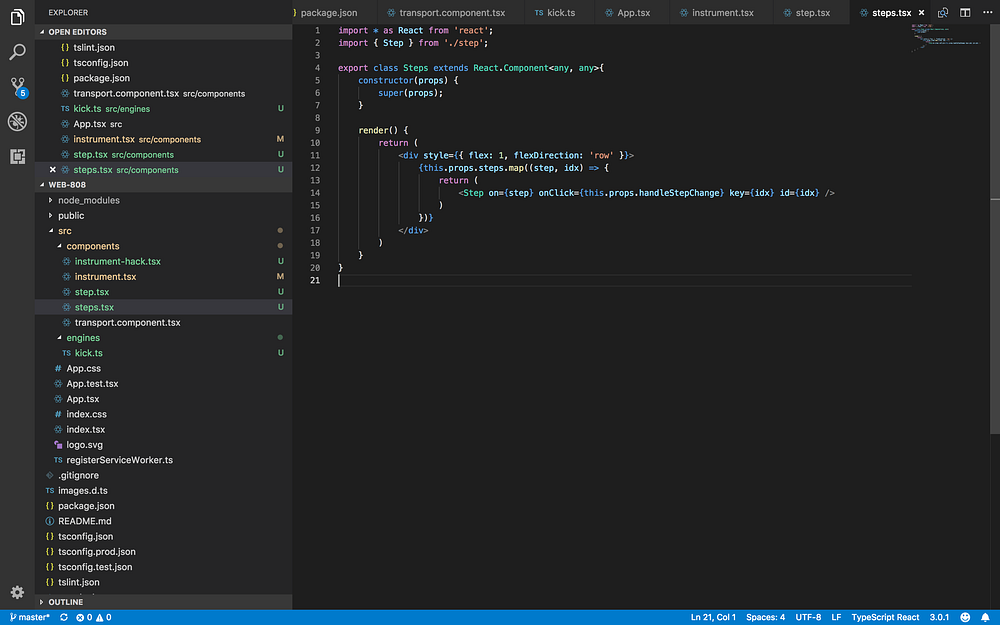
As you may have realised, the Steps component receives a steps by props, thats an array, that will be kept in the TransportComponent `s state.
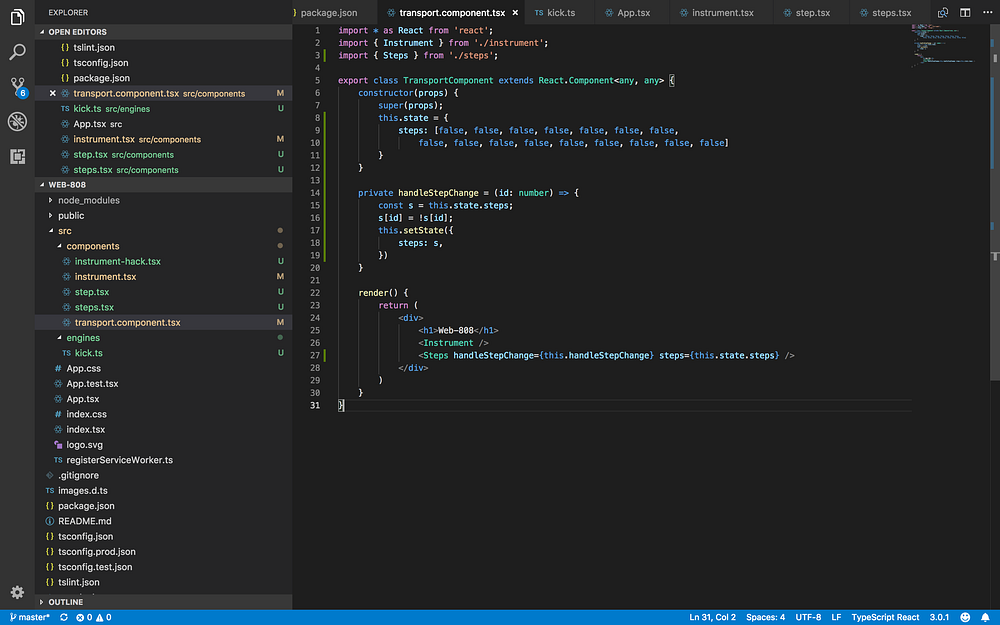
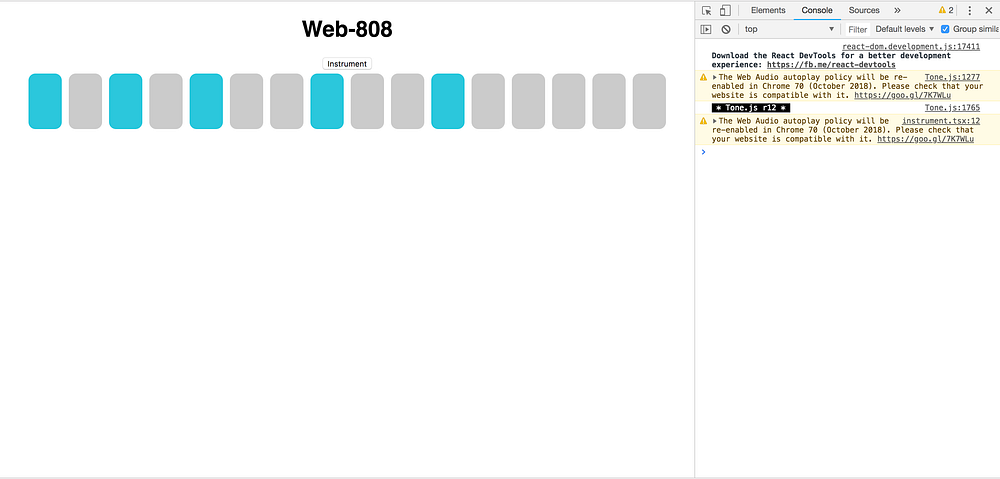
That leaves us with pretty steps!
Integration
The steps are all cute and responsive. The only thing they don’t do is work.
To make them work, the InstrumentHack will pass the steps array to the instrument and the instrument will recreate it's loop.
So first we wrap the Instrument with the InstrumentHack , then we change the InstrumentHack to pass the steps to one of it's children. Right now it only has one child, but in the future we'll want to route the steps to a specific child.
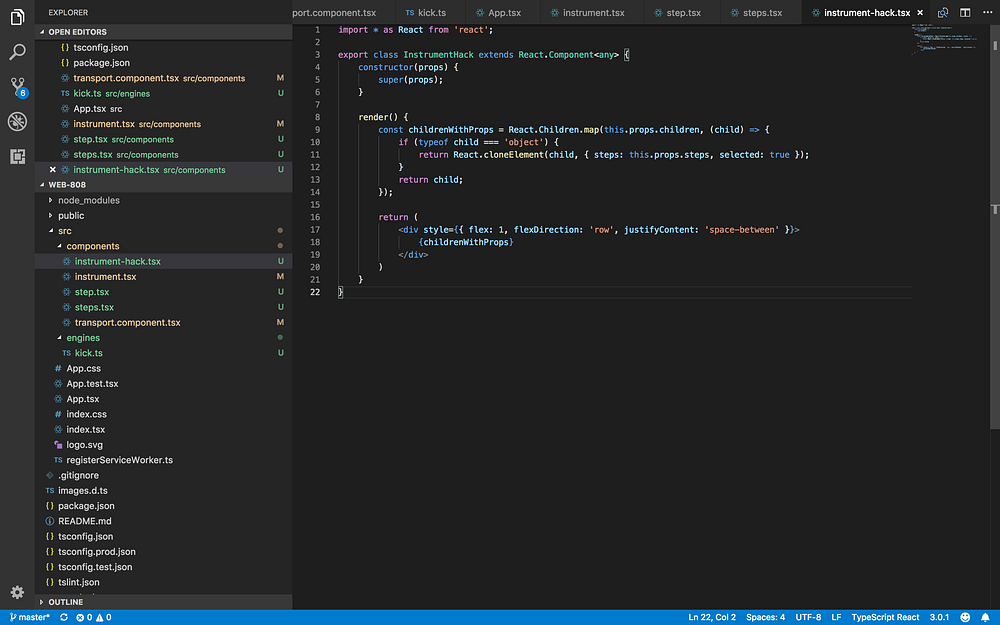
Now the instrument will have it's own state with a copy of the last given steps. When the instrument updates, we'll compare if the array changed deeply, that is, we run a for loop comparing each position of the arrays. I wrote a function for that
areEqual = (a, b) => { a.forEach((item, index) => { if(item !== b[index]) return false } return true;}
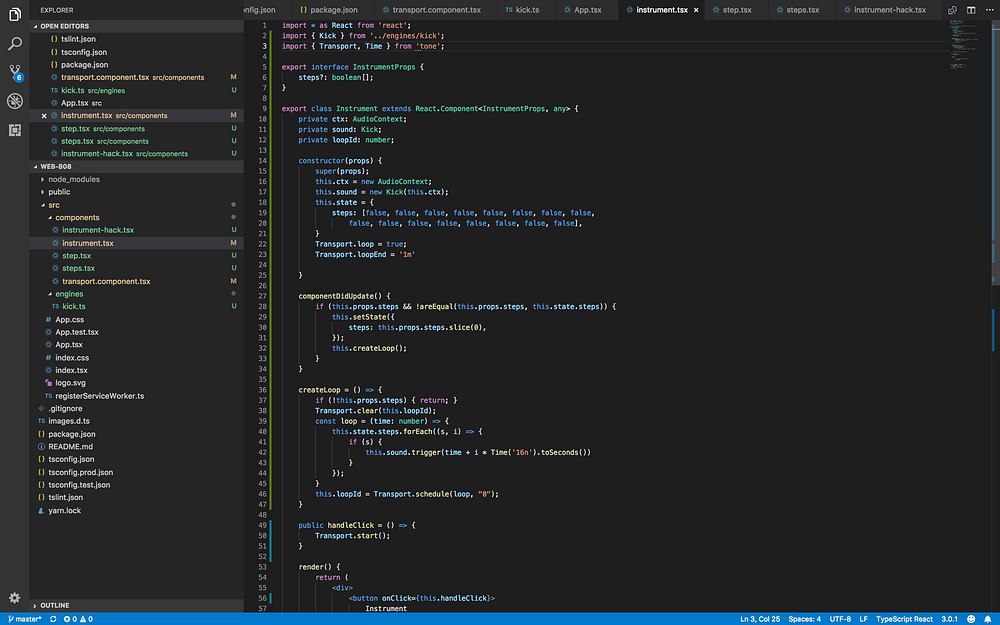
If you're wondering, the render method didn't change.
Play/ Pause
I'm starting to become insane listening to this kicks. Lets create a play and pause.
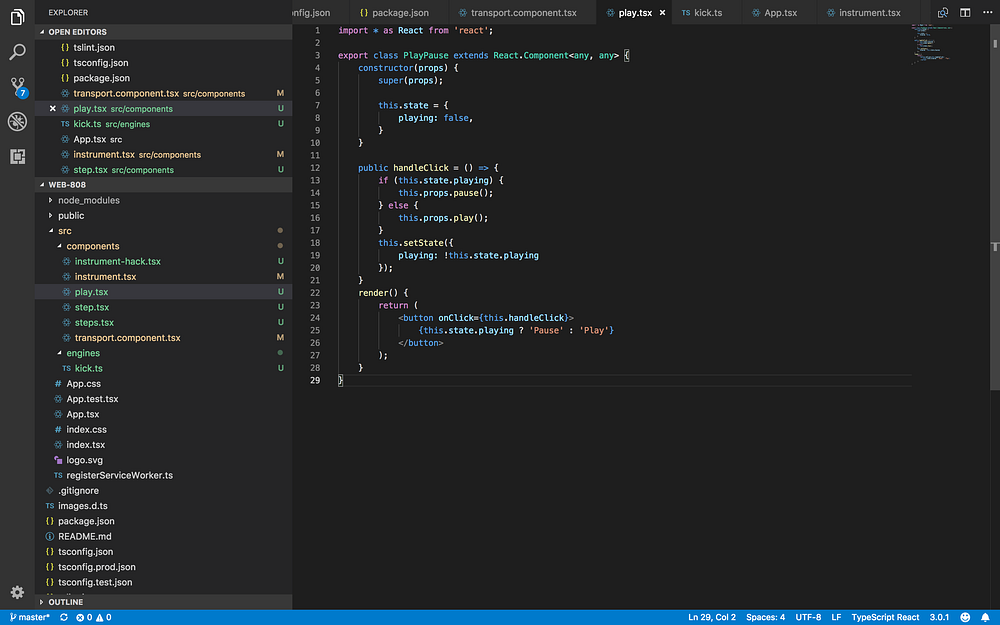
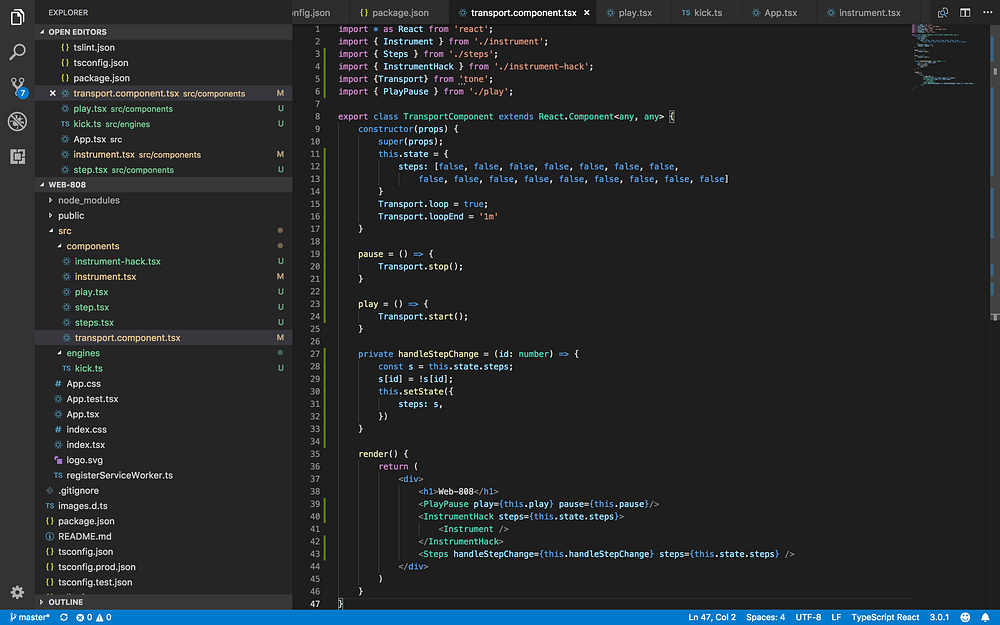
So we're going to take the Transport.start from the instrument and place it into a method in the TransportComponent .
More Instruments
This kick is not enough, lets create a snare, clap and a hat. For good practices I'll create an interface for audio engines.
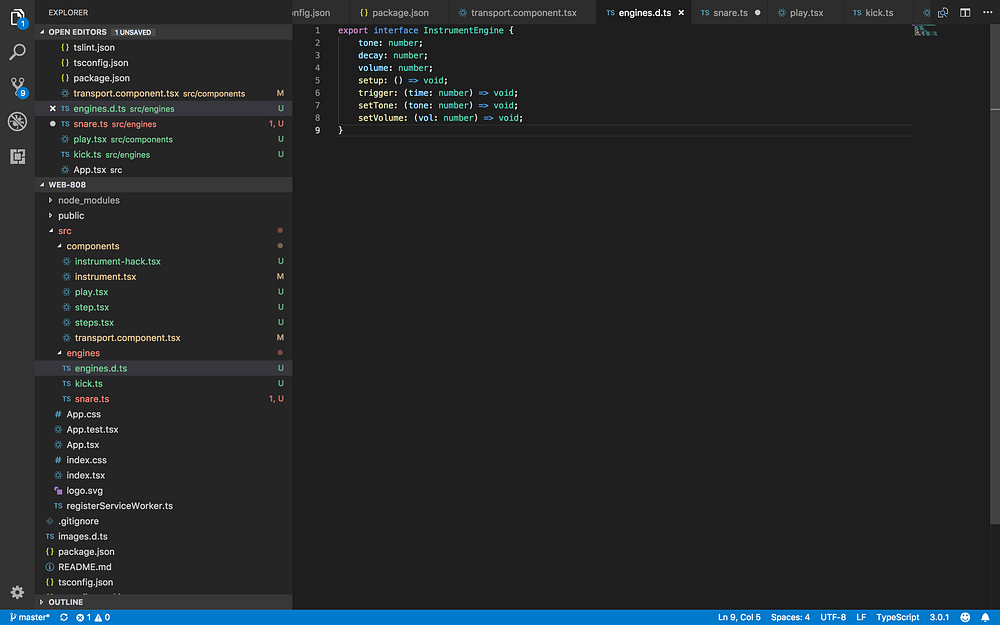
Thats it.
Snare
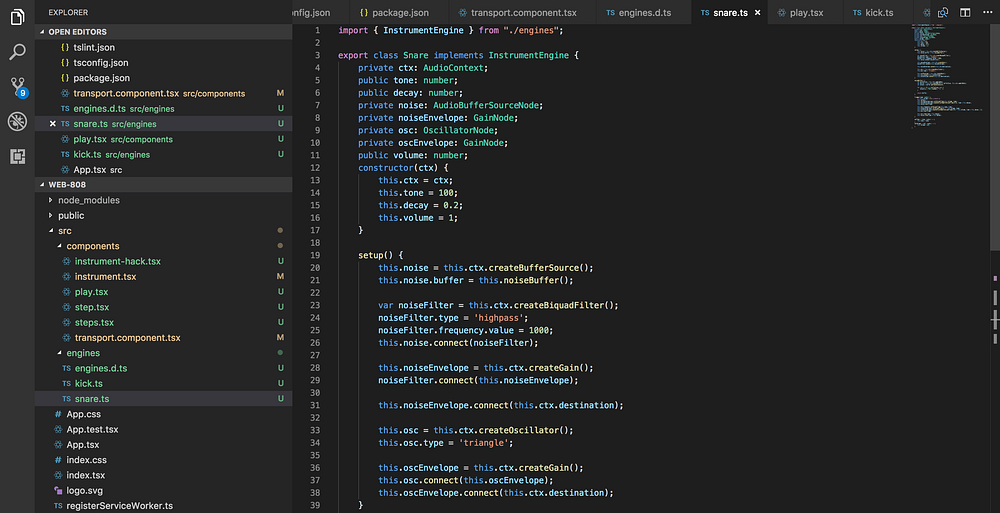
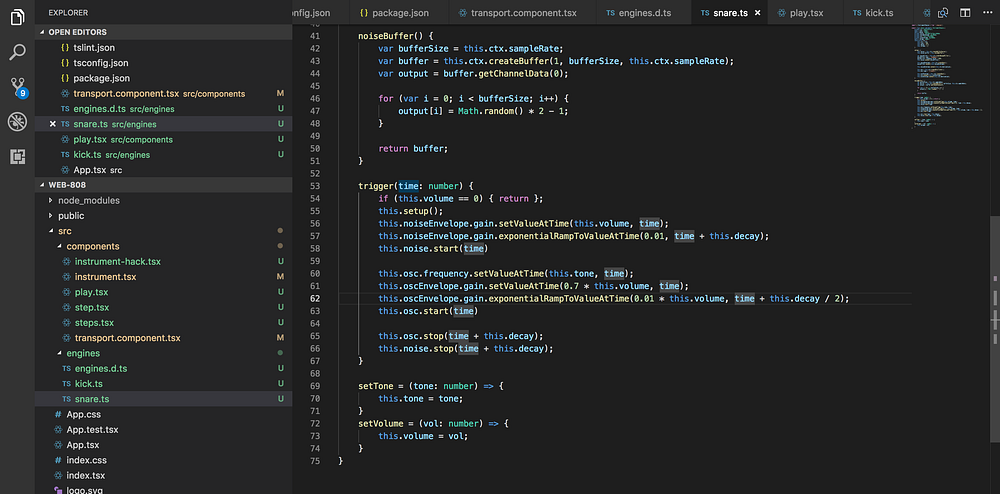
A snare is just white noise (random noise) that decreases it's loudness in time and an oscillator to add some harmony. It also uses a filter to take some frequencies out.
Clap
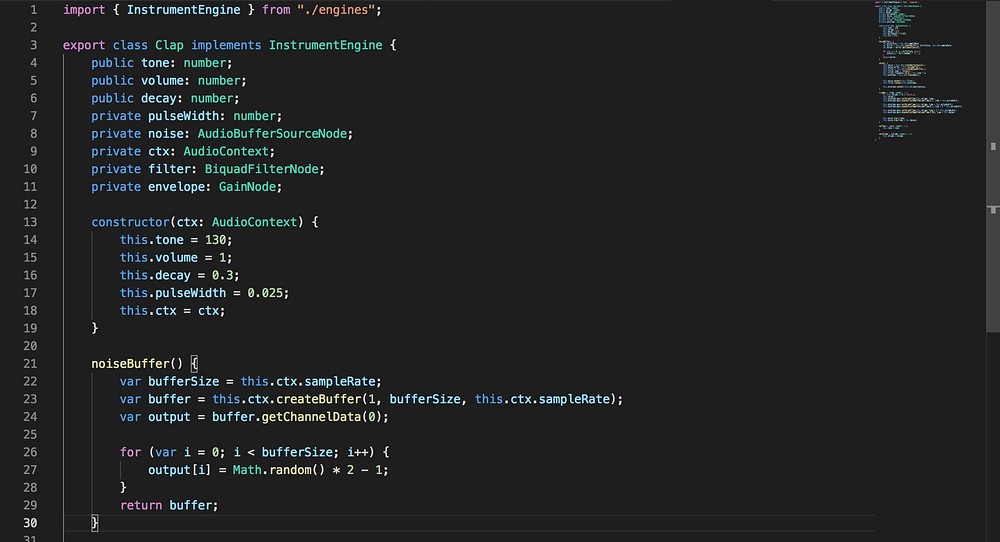
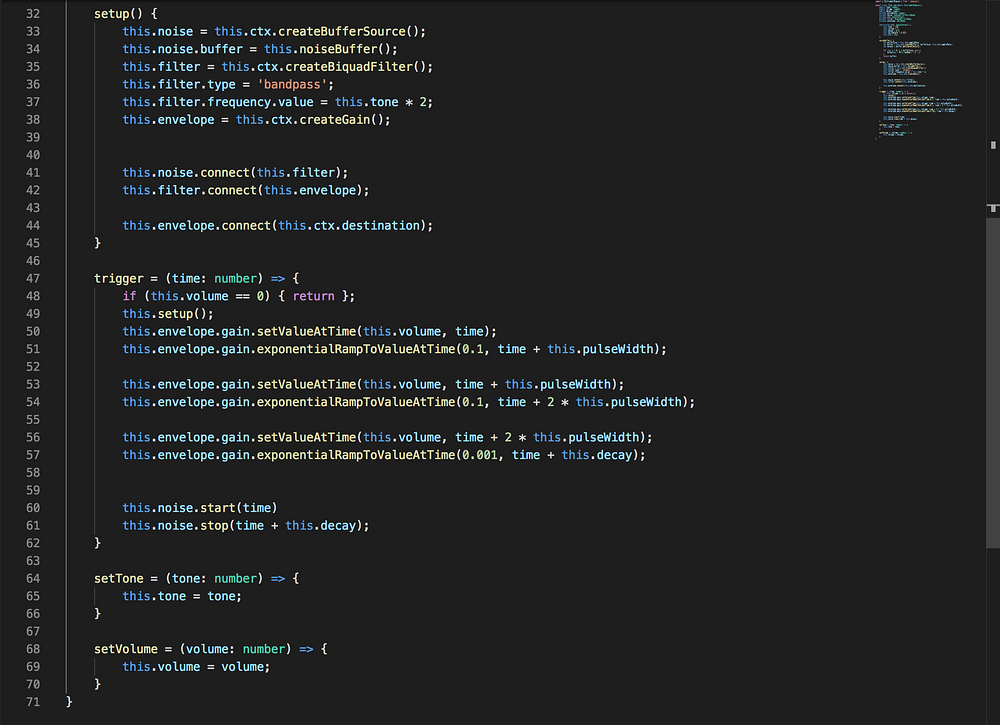
The clap is a bit more complex, but lets give it a shot.
The clap is composed of white noise purely. The loudness of this white noise (we call it the envelope) rises three times and falls shortly.
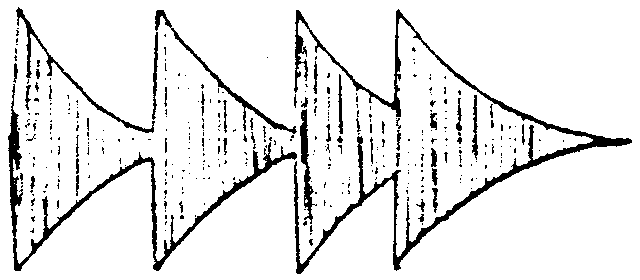
This is from the 808 original manual. They use 4 pulses separated by 30 milliseconds, I prefer 3 separates by 25ms.
Hat
This is the most complex of them all, but nothing can shake our confidence.
The hi hat sound is a sum of 6 square waves in a very specific proportion. This proportion is what gives it the metallic aspect. We'll route the waves through two filters
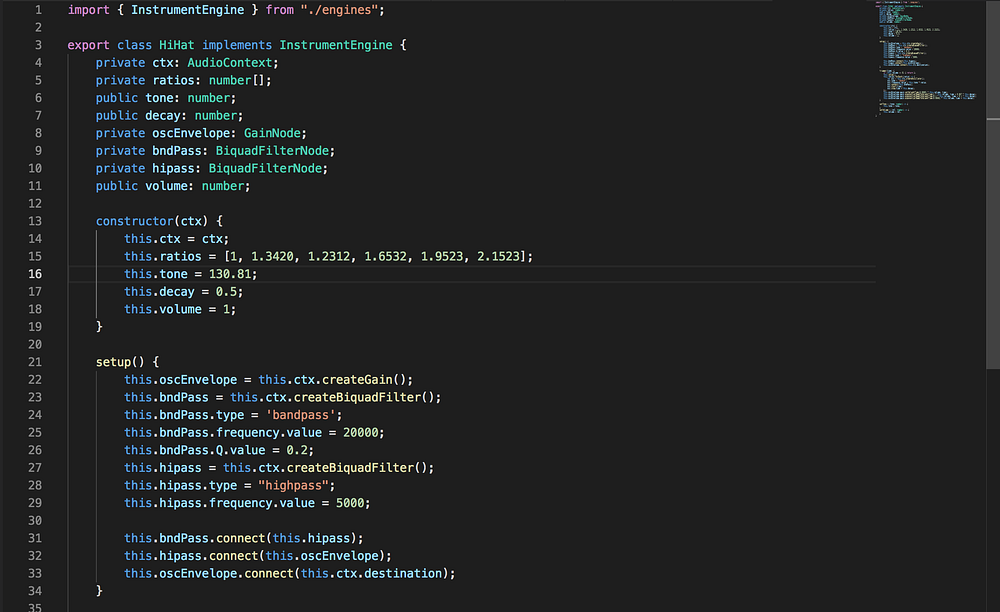
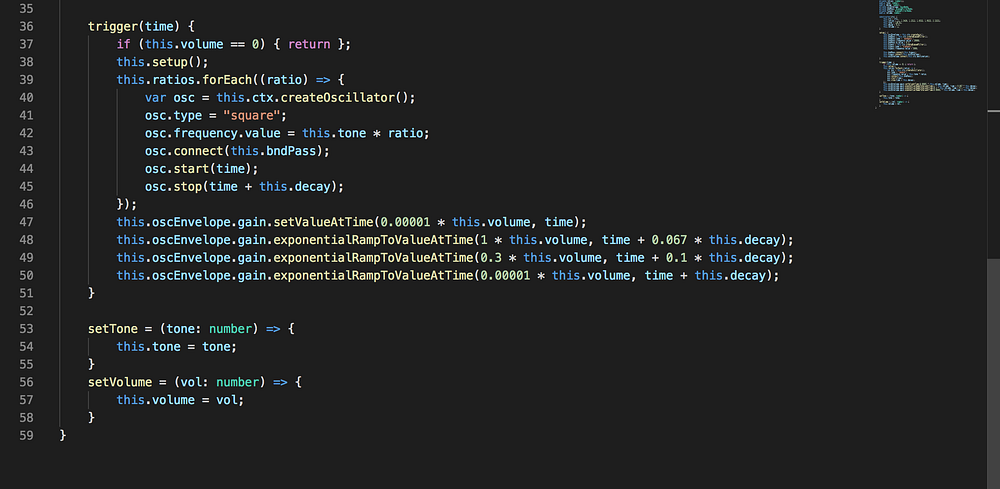
And now we're done with the engines. phew
Making a Jam
We have to modify the instrument to be able to tell which sound engine each instrument will use.
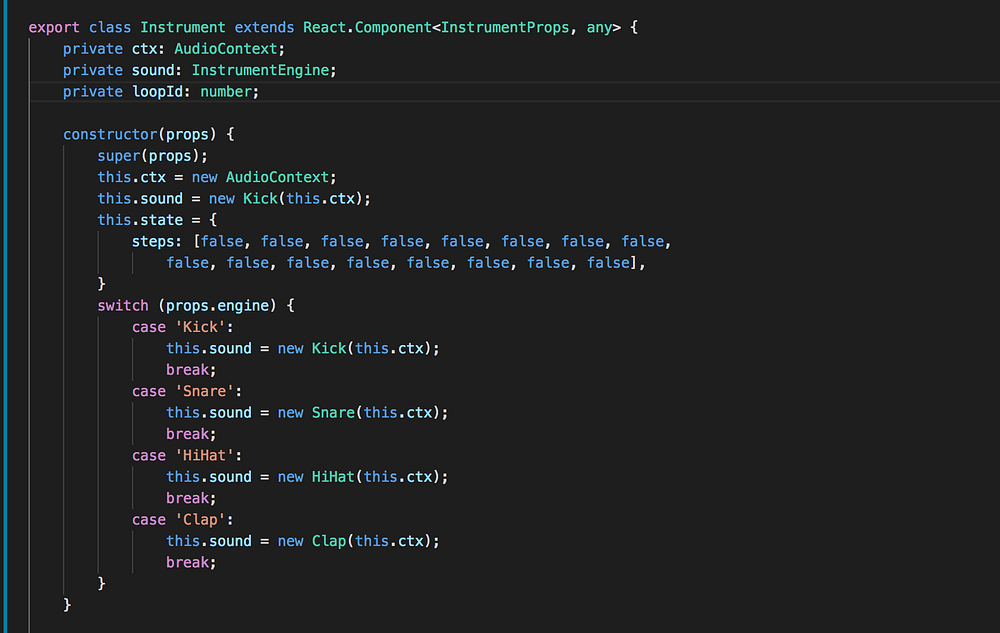
This is really the only modification to make in the Instrument
Selecting Instruments
The InstrumentHack will have a selected instrument to which it passes the steps, the others will receive null
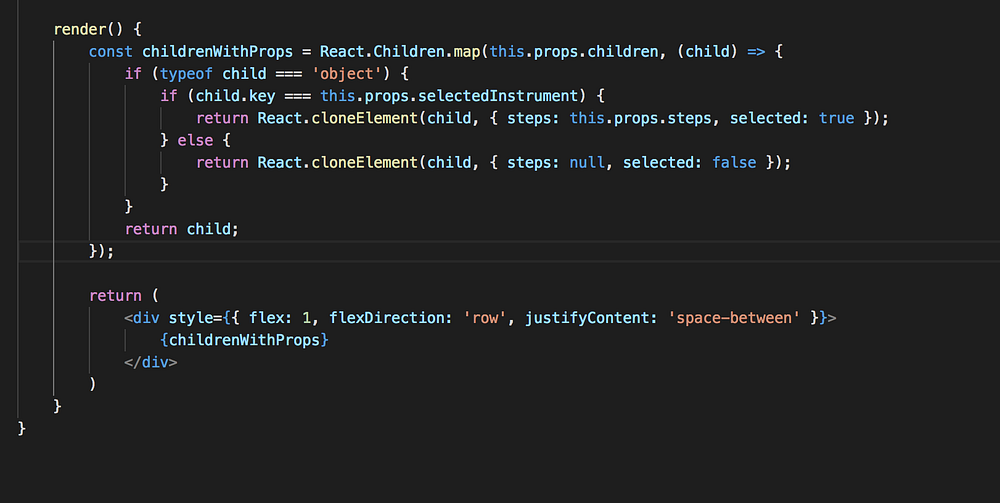
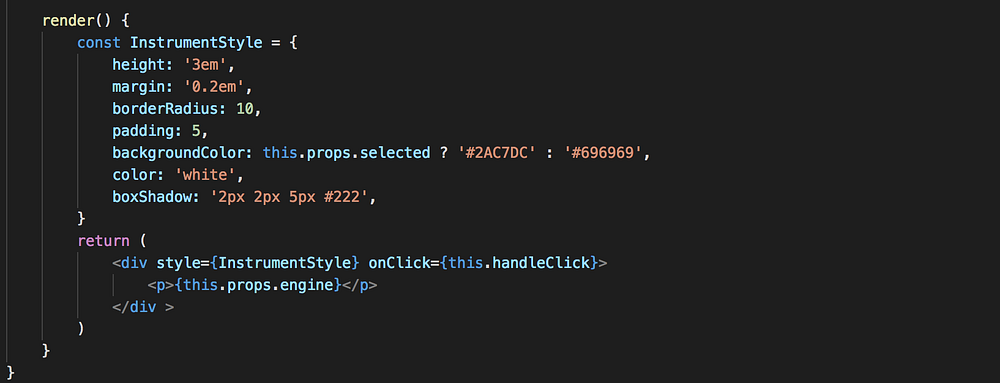
The Instrument will have a button that when clicked selects that instrument. This is the render method for the Instrument
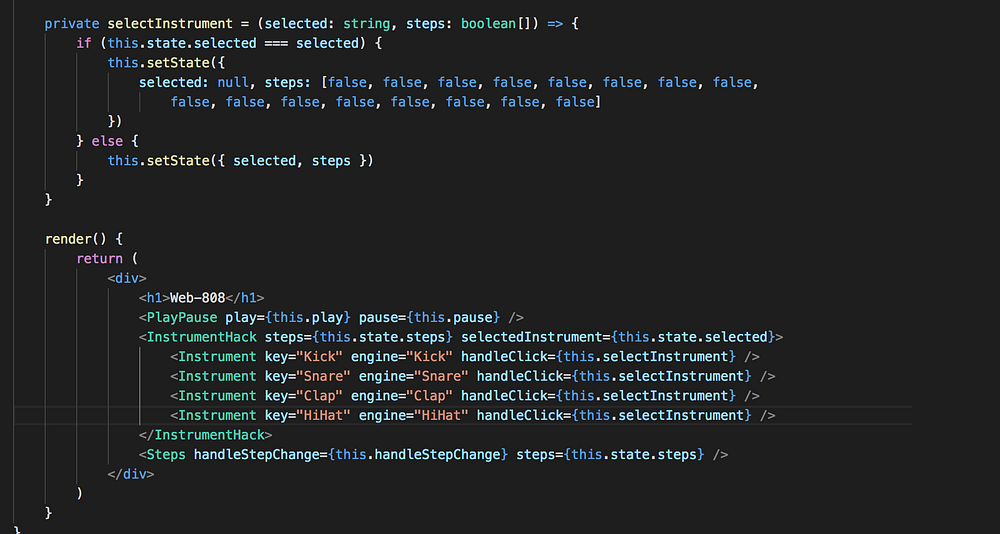
And finally the TransportComponent will have in it's state which instrument is selected and pass it to the InstrumentHack
We did it!!!
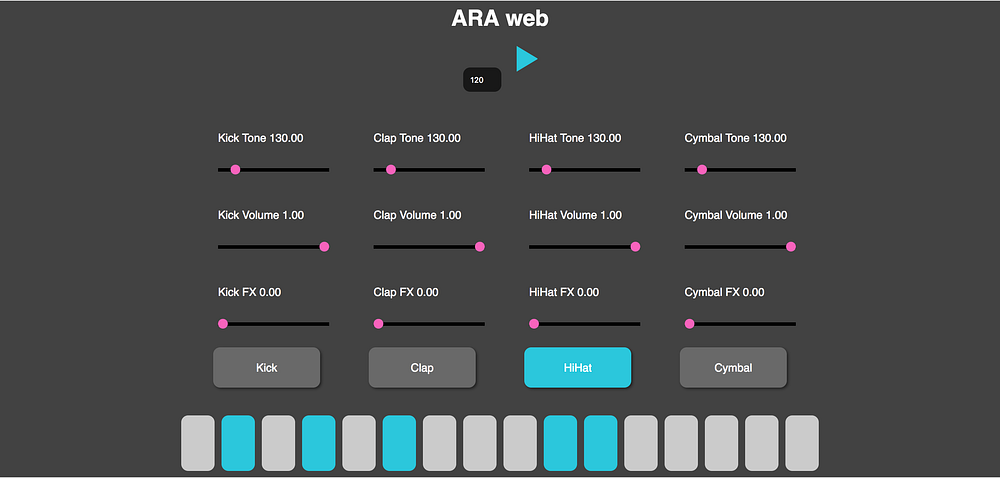
We totally did it. This still look terrible though. In my repository I finished it with CSS, created a new engine and made it possible to edit the BPM of our drum machine.
This is how it looked after the extreme makeover
If any doubts don't hesitate to ask me, or take a look into the repo
ggyshay/web-808
Contribute to ggyshay/web-808 development by creating an account on GitHub.
github.com
And if you want to see the code after the improvements here you go:
ggyshay/web-ara
Contribute to ggyshay/web-ara development by creating an account on GitHub.
github.com
This still has a lot of room for improvements and new features. Any suggestions? What about clapping along the groove?
